
Chasing the light: how to use natural light to elevate your food or product photography.
Natural light. It’s always available and if you can master it then you can take a great photo. We’ve lived in this home, on our beautiful piece of land for over 9 years now and there are distinct differences between the way the light falls and enters our home in the summer, versus the winter. Mid to late afternoon in our living/dining/kitchen area in winter, the light falls long and reaches all the back to our dining table on the Eastern side of our house. It’s a warm light. A soft light. It is a light that, right in the depths on winter, creeps in and warms us in a way that the summer light can’t. I've photographed hundreds of plates of food in my life, for magazines and brands and my own scrappy beginnings, and I still stop what I'm doing when that light arrives. Natural light is the thing I love most about this work — it's free, it's always changing, and it makes food look like food: alive, generous, worth sitting down for.
If you're starting out, or you've got a small business and you're tired of your dishes looking flat and grey on your phone, this one's for you. No studio, no thousand-dollar flash, no gatekeeping. Just a window, a bit of patience, and a way of seeing.

Brown Sugar Vanilla Meringues shot with side light from a west facing window.
Find your light before you find your plate
Before I begin a shoot, I find the light. This is the bit most people skip, and it's the one thing that will very quickly transform an image. Walk around your house at different times of day and watch how it falls. You're looking for soft, directional light — bright but not harsh, with a clear sense of where it's coming from.
A big window facing away from direct sun (south-facing here in Aotearoa, or any window the sun isn't blasting straight through) is your best friend. That's your soft box, your studio, your everything. Direct, hard sun gives you blown-out highlights and shadows with knife-edges — beautiful occasionally, a nightmare usually. Soft, indirect light is forgiving and gentle, and it wraps around the food instead of attacking it.
Read the direction
Position whatever it is that you are shooting so that the light is shining in from the side of it, this is the quickest way to naturally illuminate something. When the light comes from the side of a photograph, it rakes across the surface of the food and reveals texture — the craggy top of a scone, the glossy slick of a dressing, the fuzz on a peach.
Having the light source behind your food or product, known as back-lighting, give it a light, bright effect, almost like a halo around whatever it is your are shooting. When it comes from behind like this, it lights up the edges, makes steam visible, and gives liquids and glazes that gorgeous inner glow. Both create shadow, and shadow is what gives a photo depth and shape.
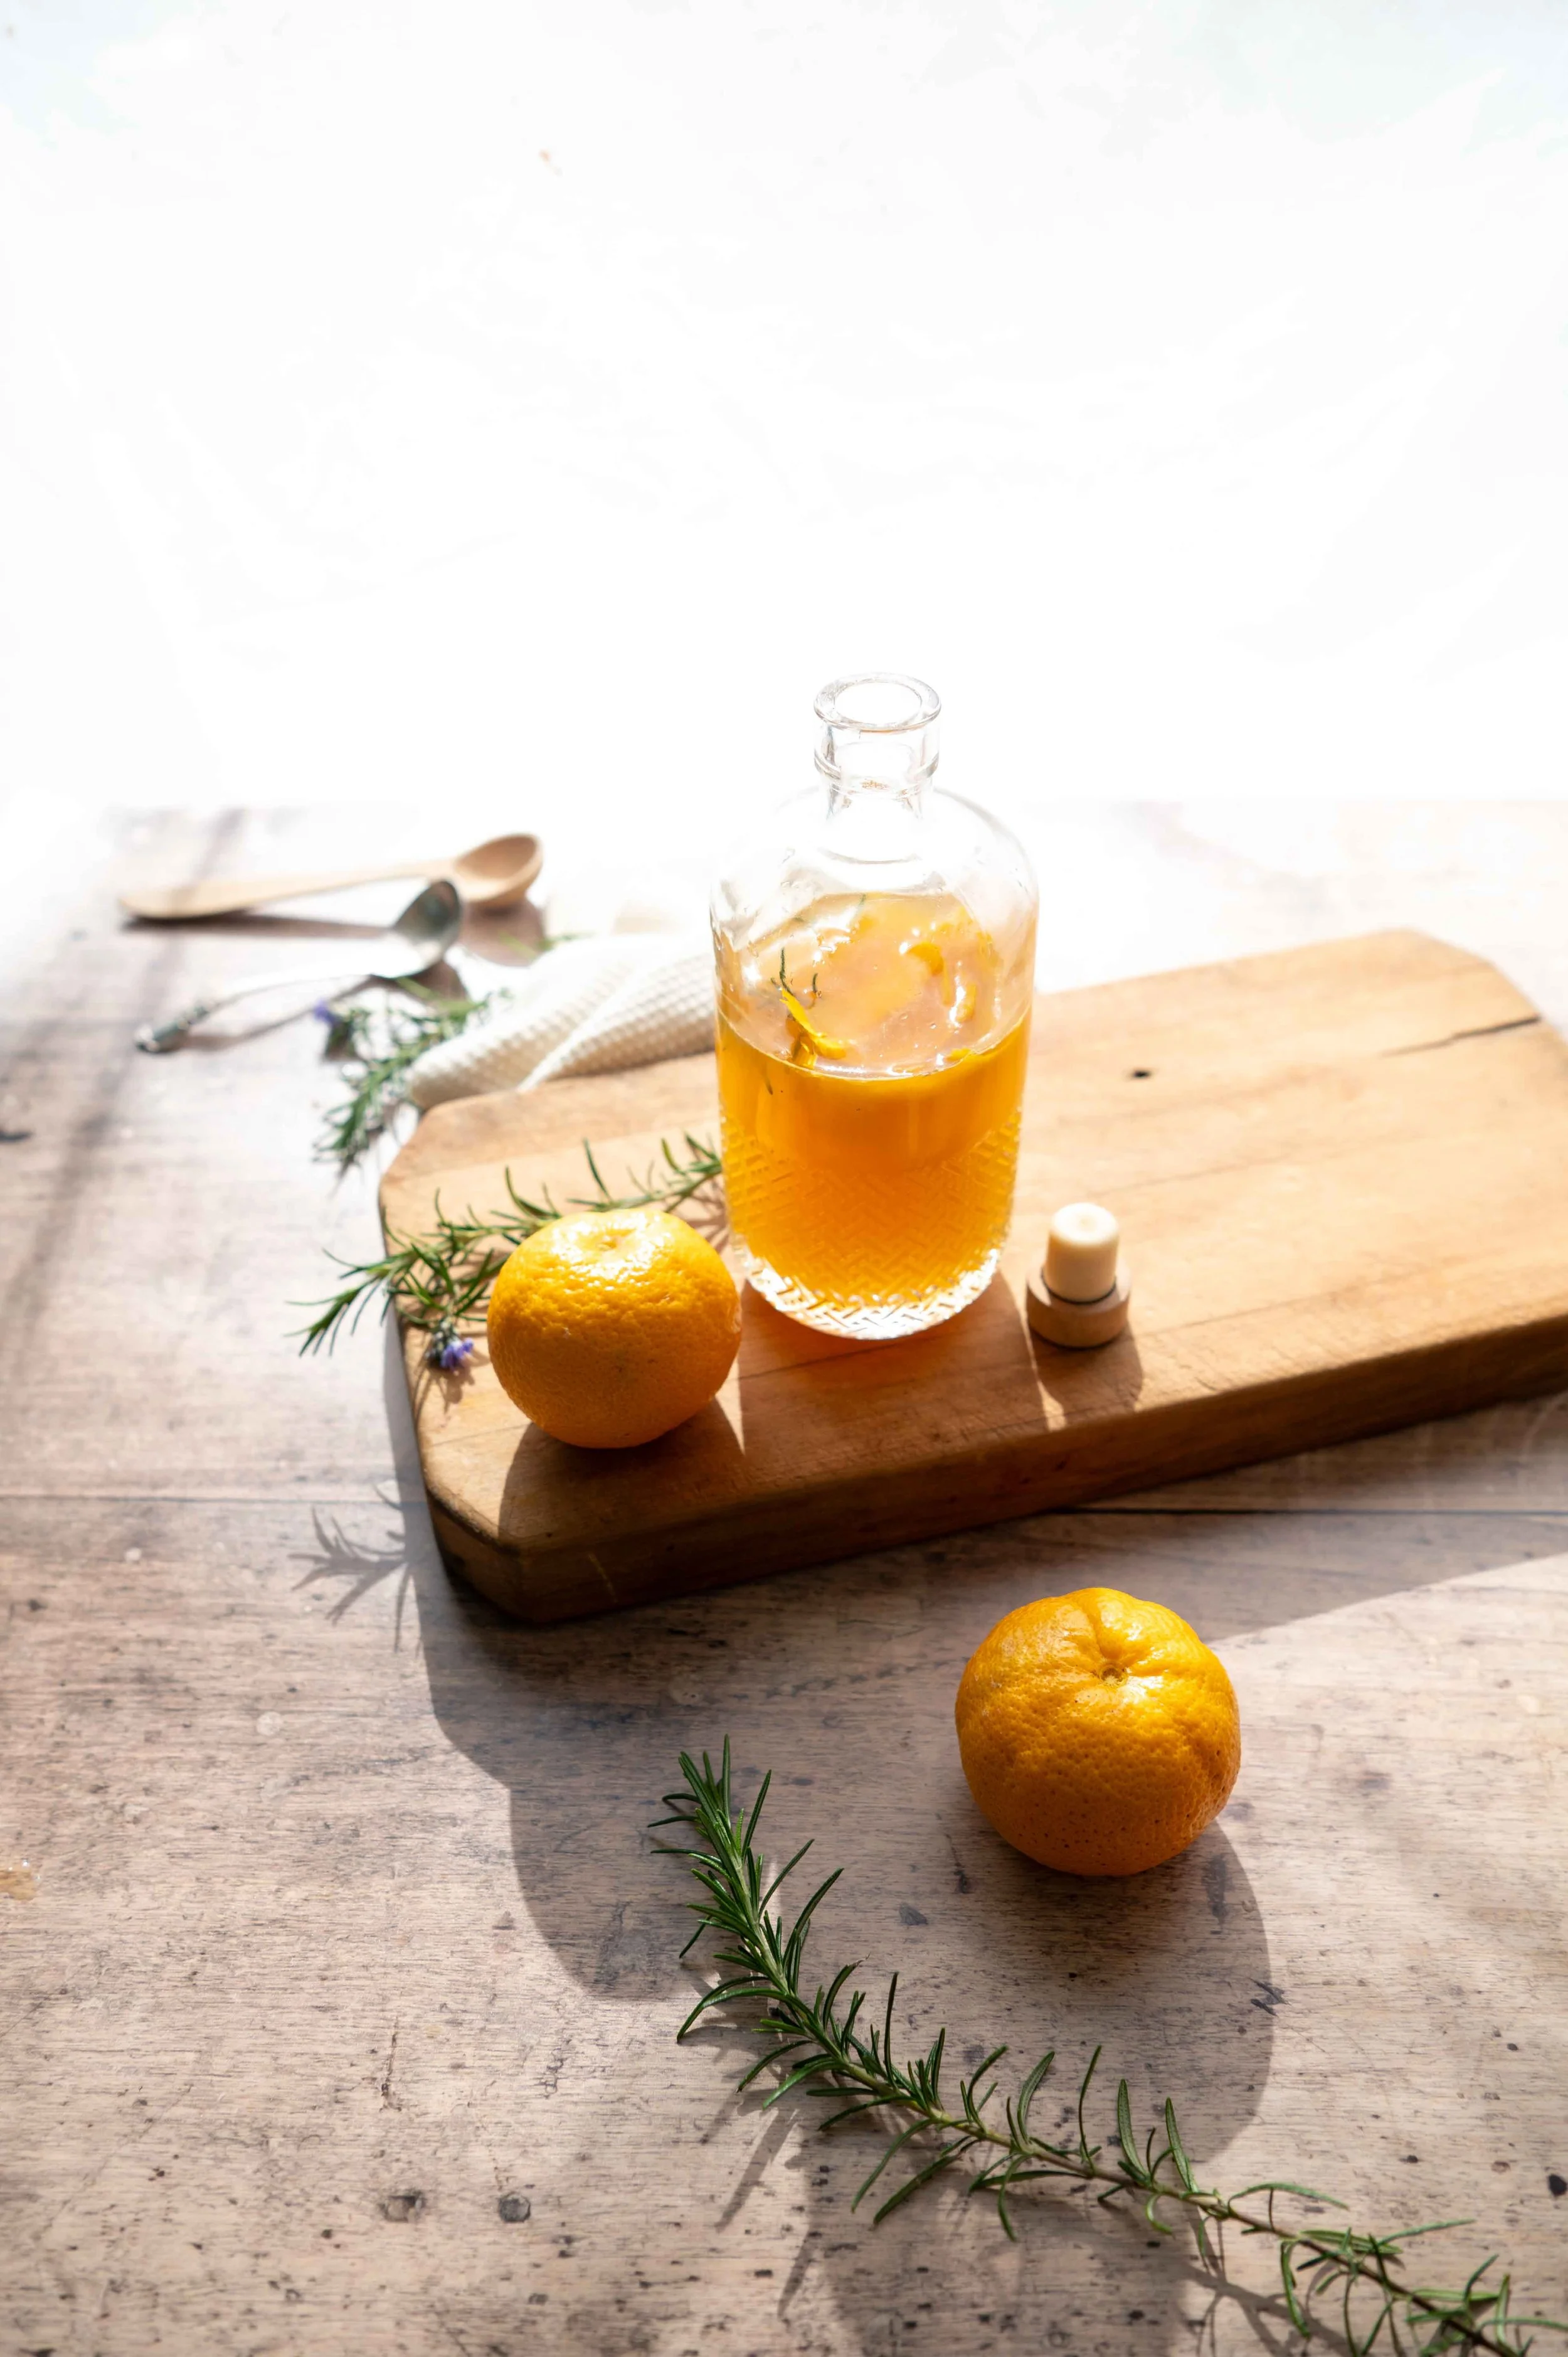
Orange & Rosemary Syrup, shot with backlighting.
Front light — light coming from behind you, over your shoulder, straight onto the food — flattens everything. It's the reason your phone snaps look like a menu from 2009. Turn the plate, or turn yourself, until the light is coming from the side or the back, and watch the dish suddenly illuminate.
Weather is a styling choice
A bright overcast day is the most flattering light there is. The whole sky becomes one enormous diffuser, the shadows go soft and long, and you can shoot for hours. I genuinely cheer when it clouds over.
If you're stuck with hard sun through the window, don't panic — just soften it. I use an old sheer curtain that I Bluetack above the window frame. But even a piece of baking paper, taped over the glass will do. You're not fighting the sun, you're just putting a layer between it and the food.
Fill the shadows (or don't)
Once your light is coming from the side, the far side of your dish will fall into shadow. Sometimes that's exactly what you want — moody, intimate, a bit Dutch-painting as with the image below. Other times it's too much, and the dark side disappears into murk. I encourage you to set up a scene and play. That is the beauty of a digital camera, you can take as many photos as you please, fail, succeed, and learn along the way.
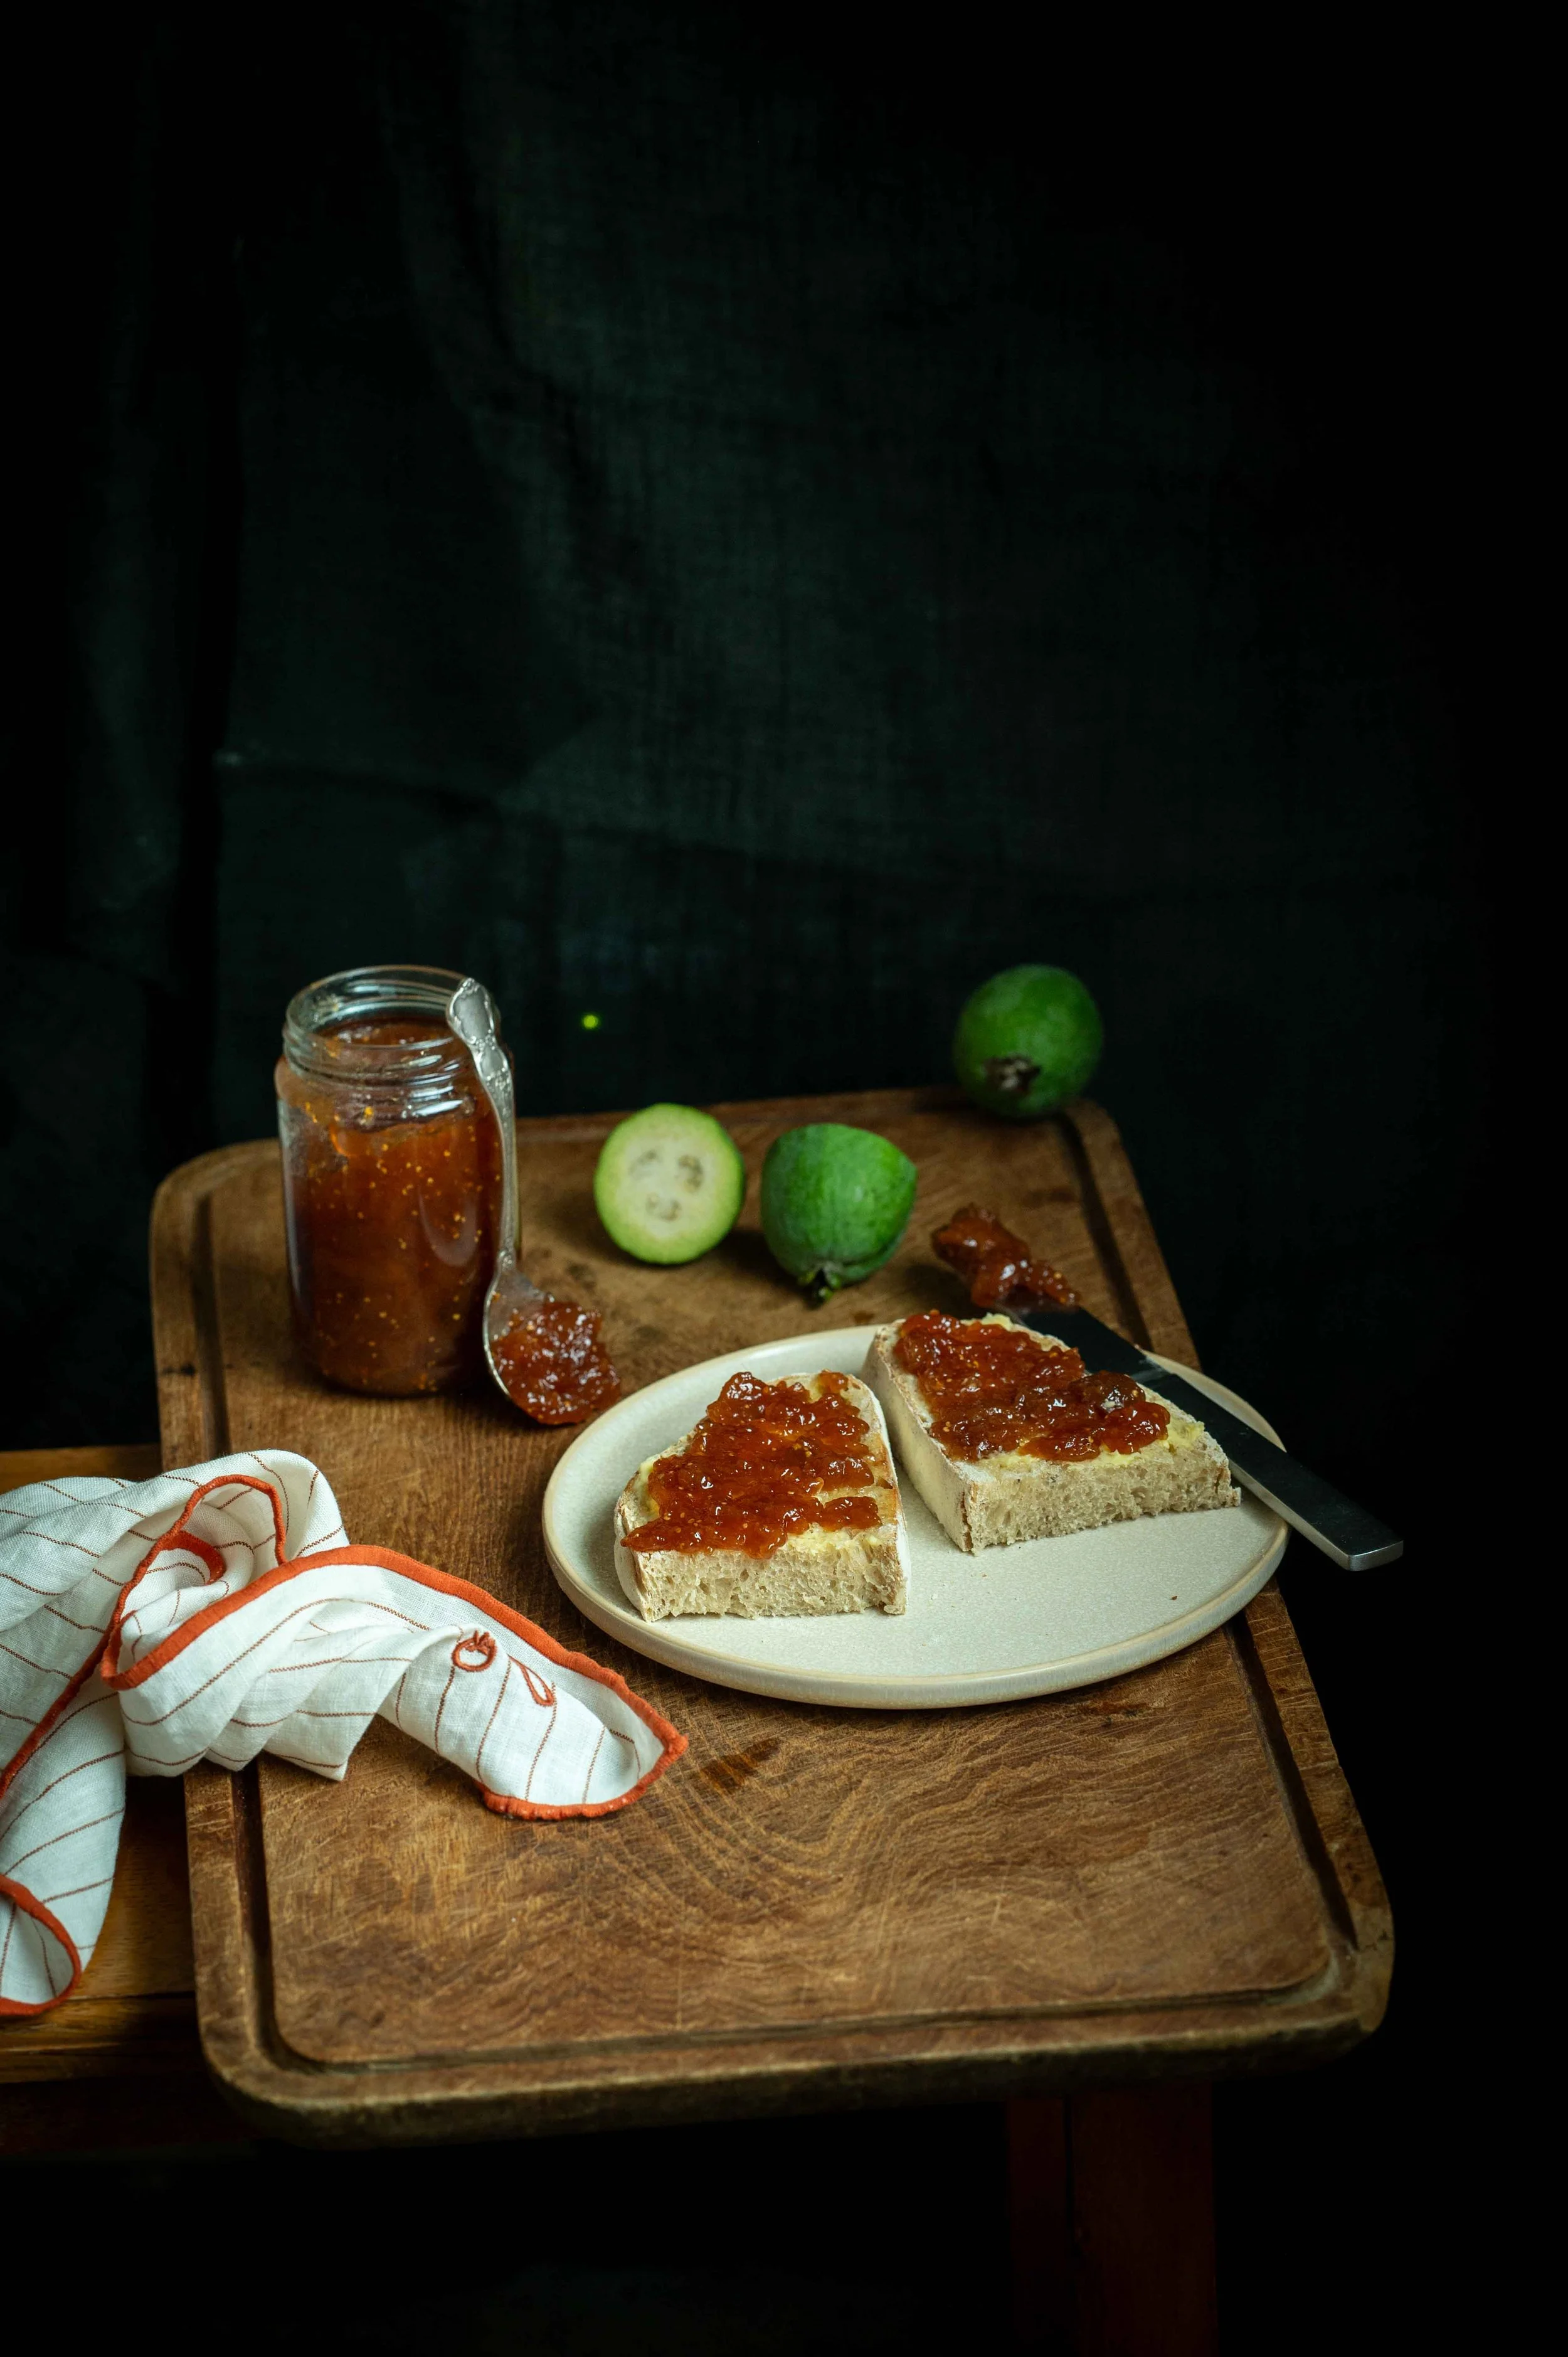
Feijoa & Ginger Jam shot using natural light coming in from the right under a south-facing window.
The fix costs nothing: a piece of white card or a piece of white fabric propped on the shadow side to bounce light back into the gap. Move it closer to lift the shadows, further away to deepen them. This one trick — light on one side, white bounce on the other — is the secret behind almost every clean, professional-looking food photo you've ever admired.
Mind your colour
Natural light shifts colour through the day: cool and blue at midday, warm and golden near dusk. Your eye adjusts automatically; your camera doesn't always. Set your white balance to match the conditions (or shoot RAW and fix it later) so your whites read as white, not blue, not jaundiced. Get this right and your food looks fresh; get it wrong and a perfectly good pavlova will look a little off.
Compose like a designer
I trained as an industrial designer before I became a photographer, and I love that I can bring the designer side of my brain to my photography work. Leave room for your subject to breathe — white space, or negative space, gives the eye somewhere to rest and makes the food the hero. Think about where the light falls, where the shadow sits, and how the empty parts of the frame balance the full ones. A photo is a little arrangement of light, colour and space. The food just happens to be the excuse.
And that's really it. Find the light, read its direction, soften it if it's harsh, bounce a little back, mind your colour, and leave some room. Do that with a single window and you'll make food look better than most people manage with a cupboard full of gear.
Five Photos to Practise (and What Each One Teaches You)
Work through these in order. Each one builds a specific skill, and by the end you'll have a small portfolio that proves you can read light like a pro.
1. The side-light hero shot.Skill: directional light and texture. Put a single dish — a bowl of soup, a slice of cake, a loaf of bread — on a bench beside a window, with the light hitting it from the side. Shoot front-o or at a three-quarter angle and watch how the texture lifts on the lit side and the shadow gives it shape. This is your benchmark for everything else.
2. The back-lit drink or glaze.Skill: using light for glow and translucence. Position the light behind the subject — a glass of juice, a jug of cordial, a syrup-drenched stack of pancakes. Back light makes liquids glow from within and catches steam beautifully. Use a white bounce card in front (your side) to stop the front going too dark. This is the trick that makes drinks look irresistible.
3. The overcast-day flat lay.Skill: soft, even light and top-down composition. On a bright cloudy day, shoot a spread from directly above — a grazing board, a table of ingredients, breakfast in progress. The soft light keeps shadows gentle so nothing competes. Now play with arrangement: leave deliberate gaps, let one or two elements run off the edge of the frame, and balance colour across the whole picture. Pure composition practice.
4. The moody, shadow-driven shot.Skill: controlling shadow and mood. Same single dish as photo 1, but this time remove the bounce card and let the shadow side go properly dark. Shoot something rich and seasonal — a winter stew, a dark chocolate pud, mulled something. The goal is atmosphere: deep shadow, one pool of light, a sense of intimacy. This teaches you that shadow is a tool, not a mistake.
5. The diffused hard-light challenge.Skill: rescuing difficult light. Deliberately shoot on a day with hard, direct sun through the window. First take a photo with the raw sun — note the blown highlights and harsh shadows. Then tape baking paper or a sheer curtain over the glass and shoot again. Putting the two side by side will teach you more about light than a week of reading. I will say too that deliberately adding shadows into your shots can also add interest, so sometimes harsh sun can work to your advantage as in the shot below. Again, play with this. Put a plant in-between the light source and your scene, and use the shadows of the leaves in the place of props.
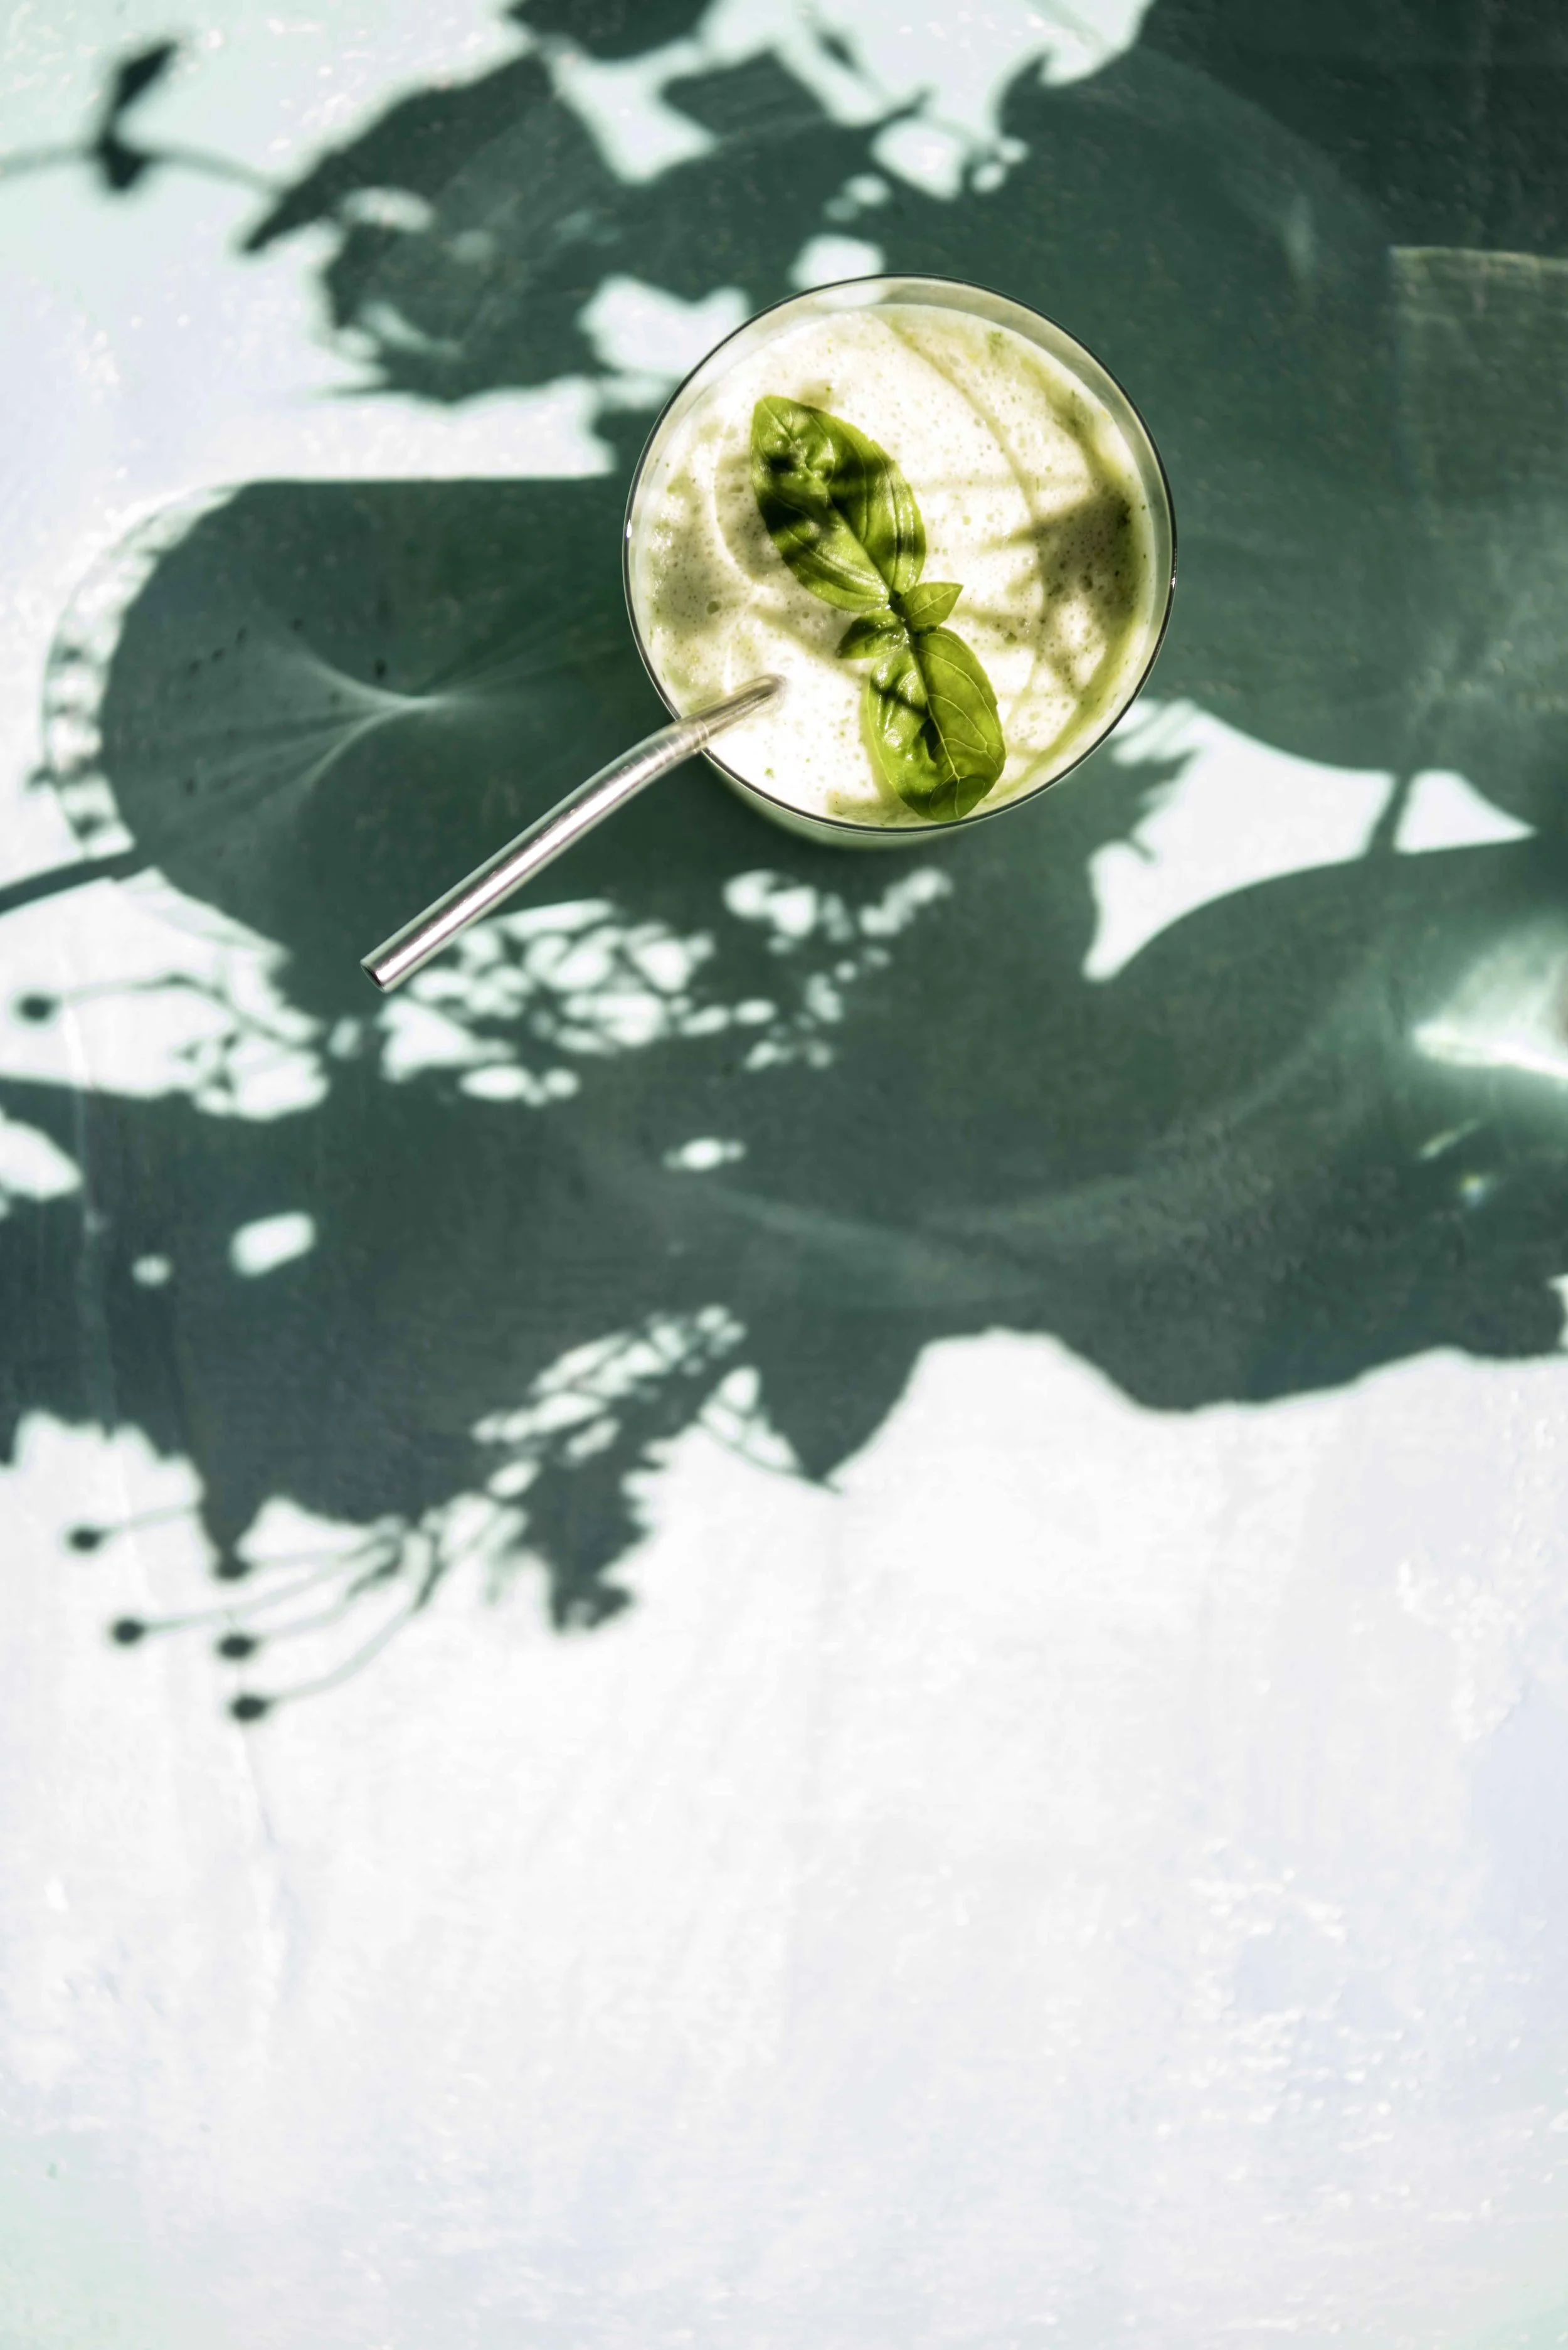
Deliberately using harsh shadows to add interest to a shot.
Practise these with whatever's on the bench. The food doesn't have to be perfect — even if it’s Tuesday’s dinner the kids are waiting on. It’s all practice. And it’s the light that does the work.